
How To Create Custom Shape Maps for Power BI

🎦 Check out our short video tutorial to see all the details in action 🎦
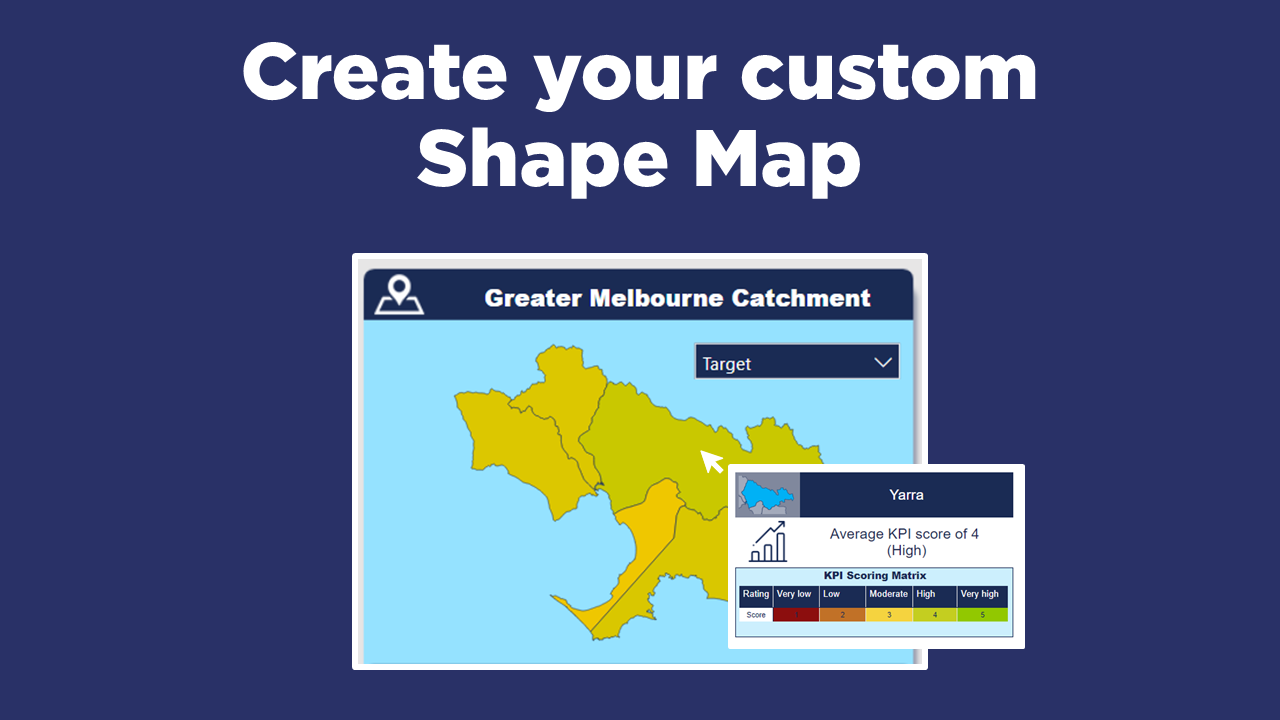
The Magic of Maps
Maps add an extra dimension to our Power BI reports. They present information in a way that is easy for everyone to understand. Working in the environmental industry, it is very rare for us to create a Power BI report without at least one map. Power BI has loads of great mapping visuals. But before you can use them, you first need to know how to find and prepare spatial files.
We show you how to use our favourite spatial tools, QGIS and MapShaper, to create and process spatial files, and how to use Shape Map to visualise them in Power BI
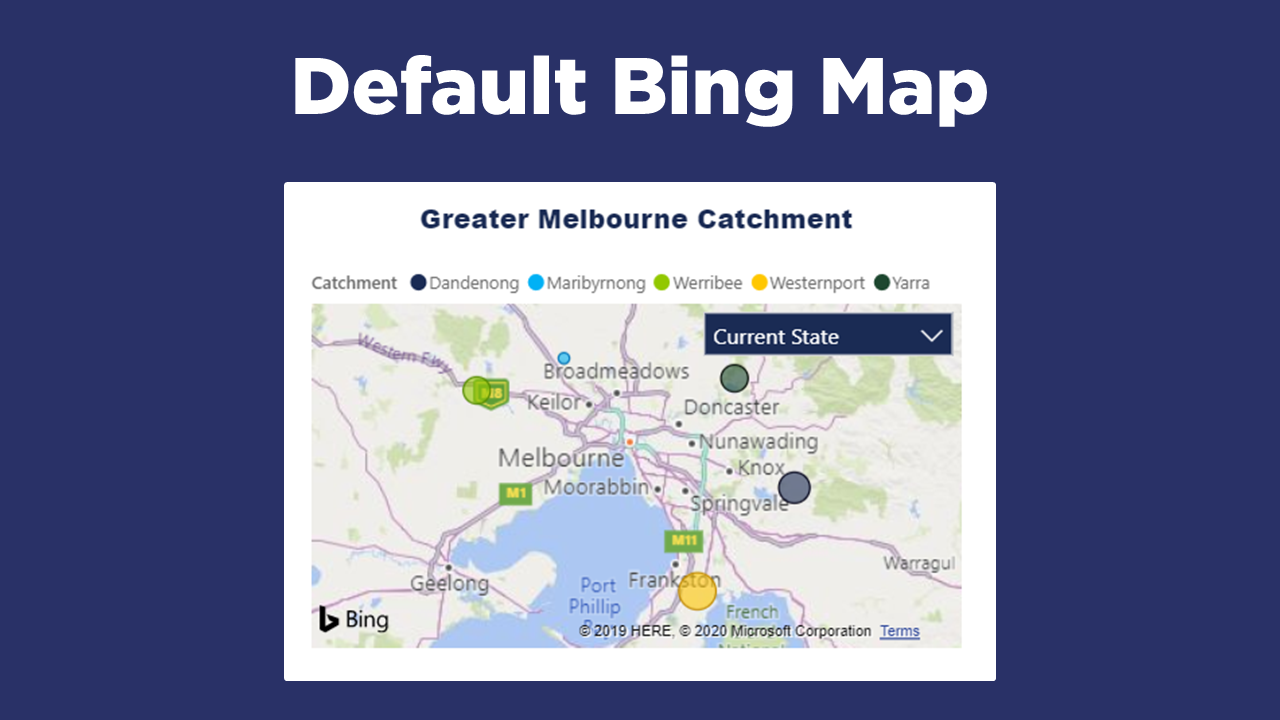
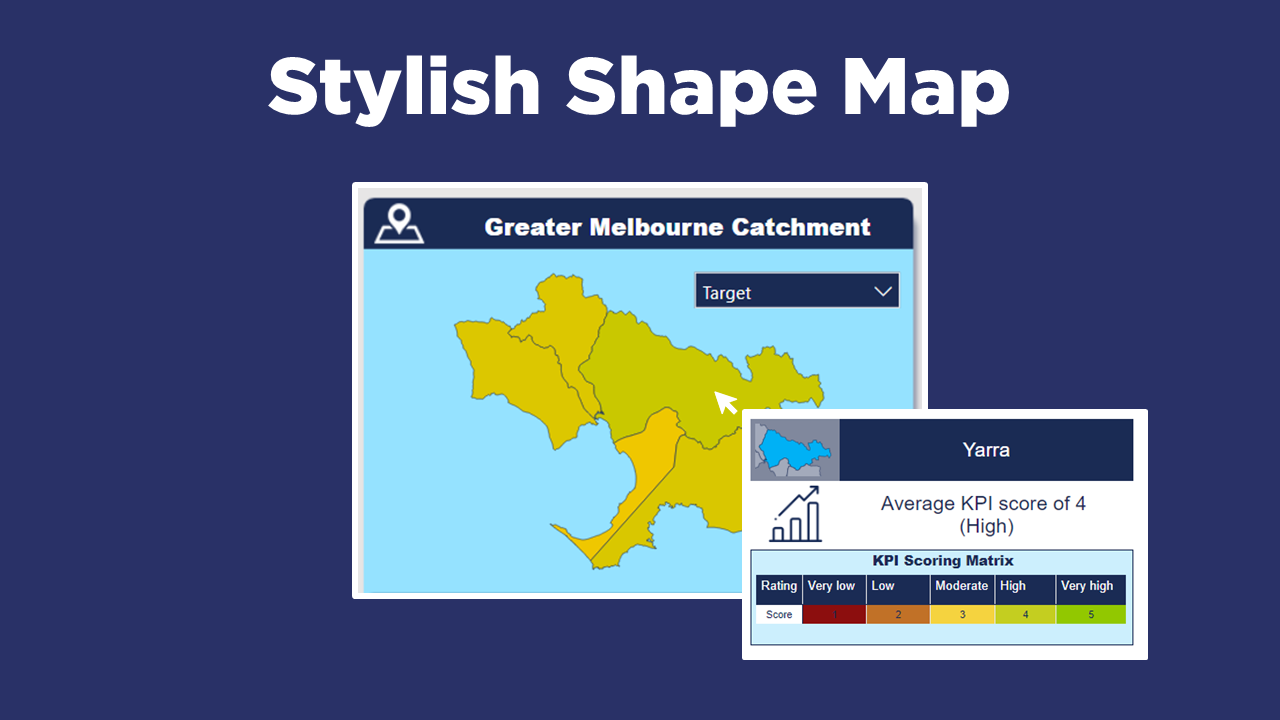
Why is Shape Map so cool? Take a look at this before and after. Converting a Bing map into a Shape Map simplifies our report and makes it easier to filter the data by selecting different regions.
STEP 1: Find Spatial Layer
▶️ Skip ahead in the video to Step 1▶️
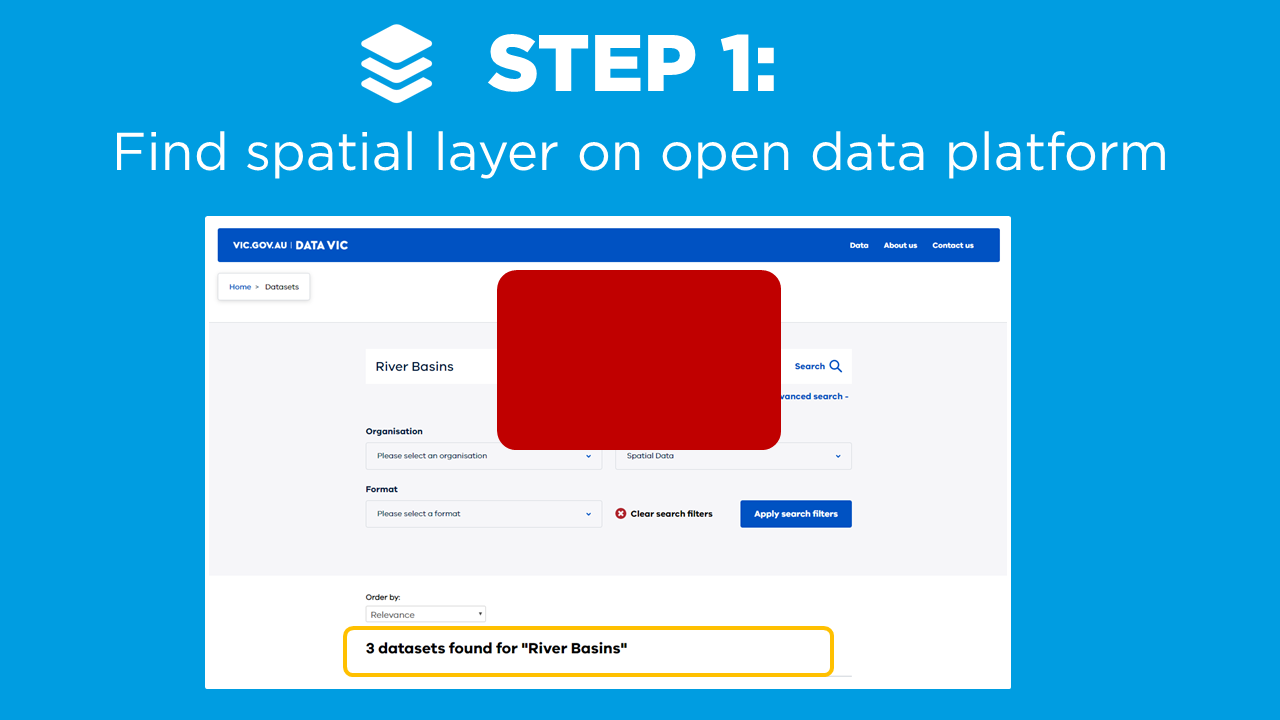
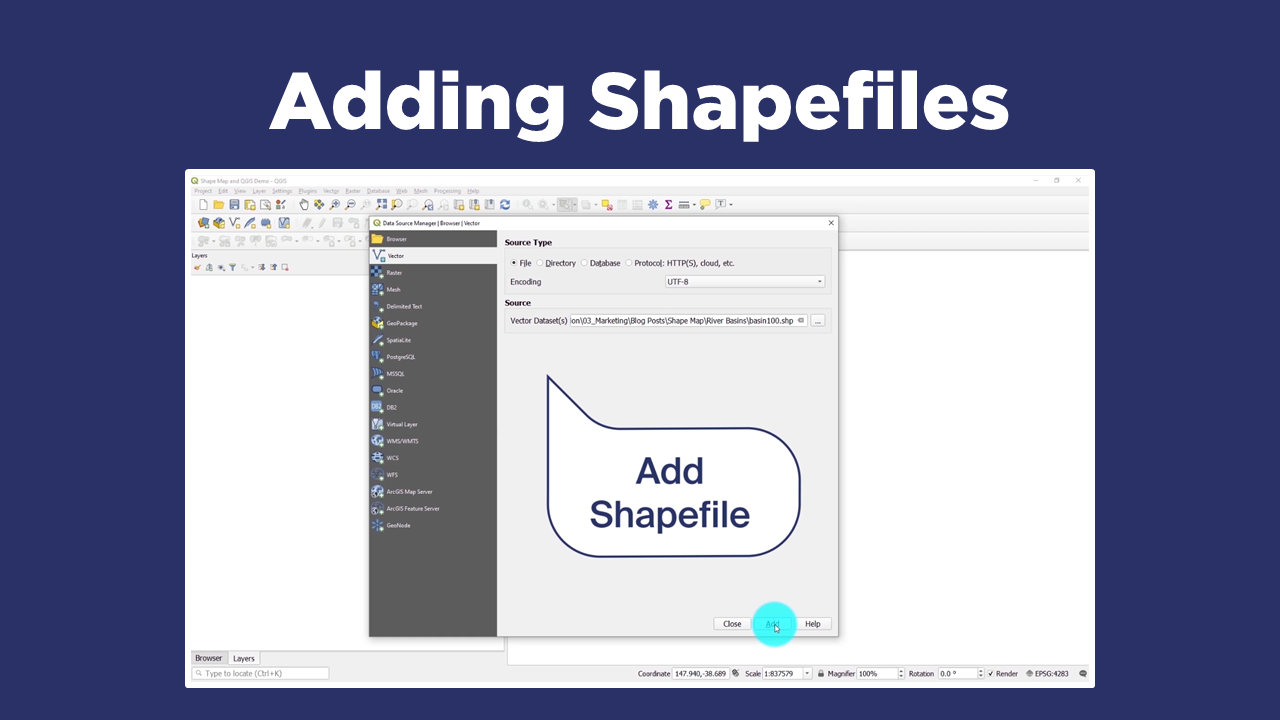
To create a custom Shape Map we first need to find the geographical spatial layer (in JSON format) that we want to visualise. Shape Map displays regional data (in the spatial world these are called Polygons), such as postcodes, suburbs, or, in our case, river catchments.
But where can we find these spatial files?
It’s always a good idea to start by searching on one of the many open spatial data platforms. Being based in Victoria (Australia), we use the Victorian Spatial Data Mart, but there are many similar databases worldwide, so get Googling and see what’s out there!
STEP 2: Create or Modify

▶️ Skip ahead in the video to Step 2 ▶️
Sometimes we may need to modify, or even create our own spatial files.
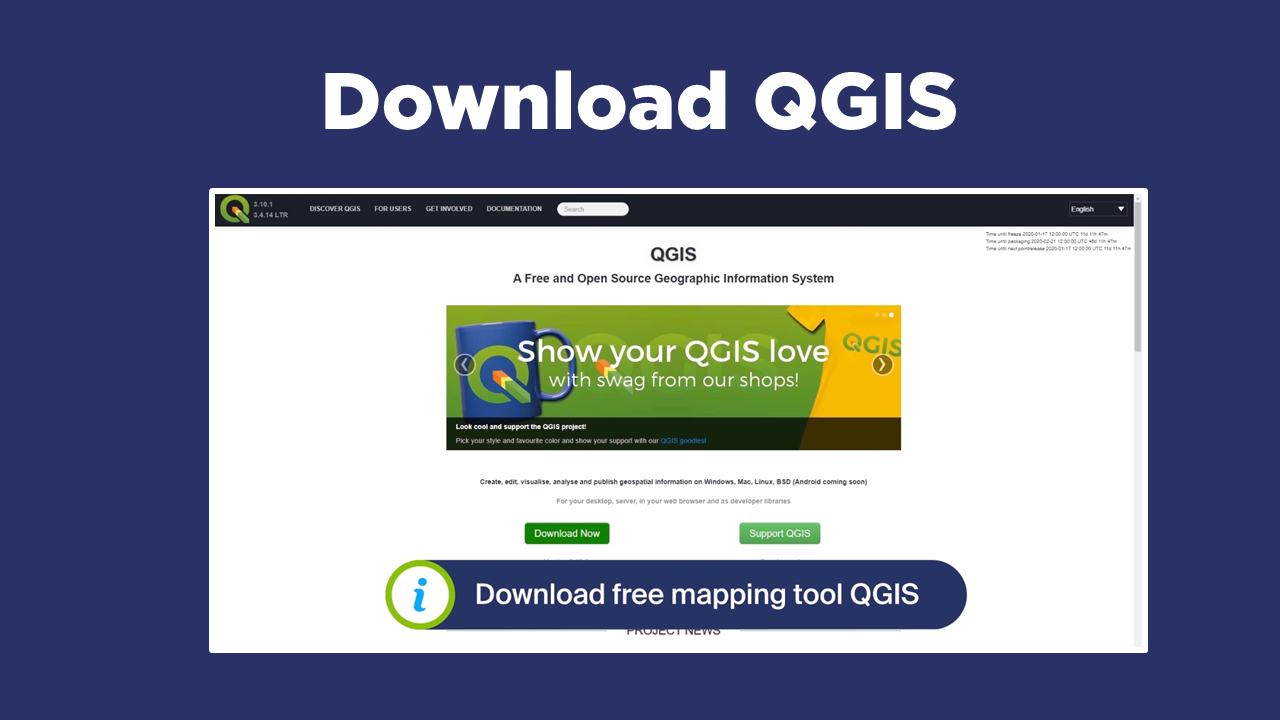
QGIS is our favourite spatial tool because it:
Is open source
Has lots of great plug-ins
Is free!
There are lots of good tutorials out there on how to use QGIS, but to get you started, we go over a couple of the basic manipulations in our video.

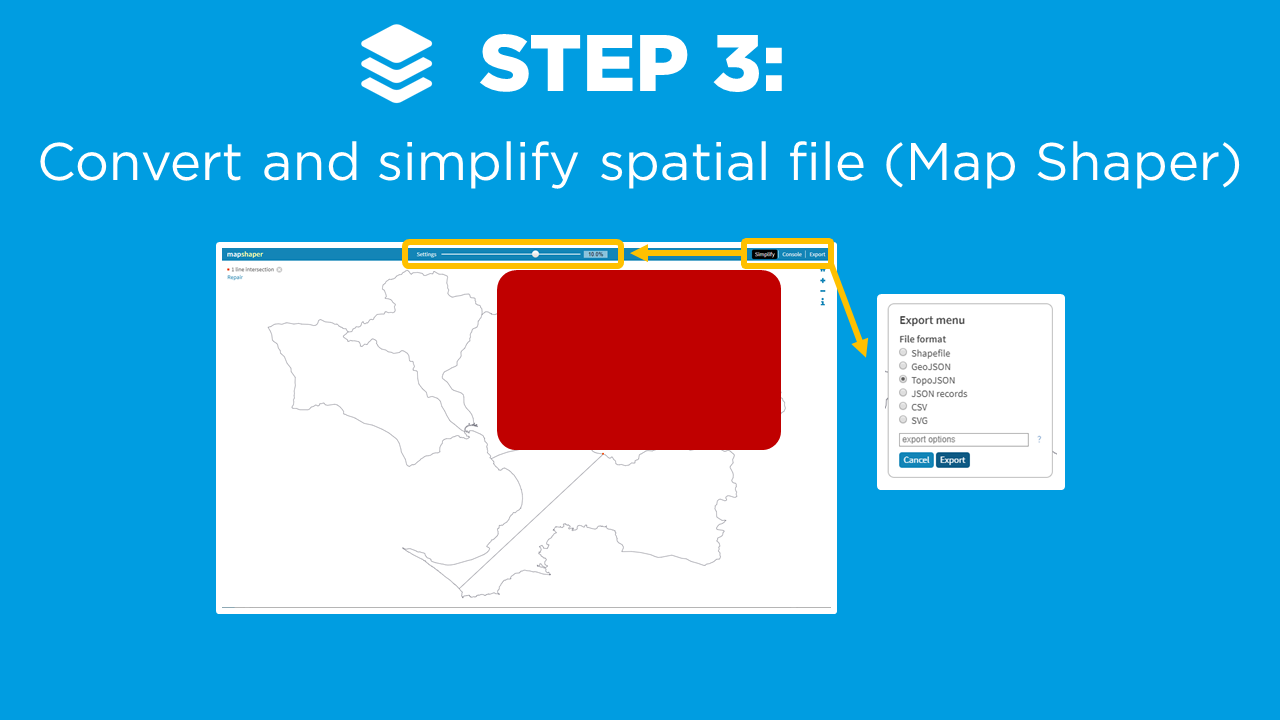
TIP 3: Convert & Simplify
▶️ Skip ahead in the video to Step 3 ▶️
Before we add our custom spatial file into the Shape Map visual in Power BI, we need it make sure it’s in the correct format. The format required by Shape Map is:
File Type: The spatial file needs to be in JSON format
File Size: While we haven’t come across any strict file size limits for the Shape Map Power BI visual (please post in the comments below if you know the JSON file size limit), we have experienced problems with files which have very detailed polygons with a lot of vertices. So it’s good practice to simplify your spatial file first!
Projection: Make sure that your spatial file is projected correctly. ShapeMap accepts the following projections: 1) Equirectangular 2) Mercator 3) Orthographic. This post on the Power BI Community Forum provides a great example of what can go wrong when you don’t project your spatial files correctly!!
Our favourite free online tool for simplifying and converting spatial files is Map Shaper, which is super-simple to use.
Map Shaper:
Imports: It accepts Shapefiles, GeoJSON, TopoJSON, CSV, and DBF.
Simplifies: It simplifies polygons to reduce the number of vertices
Converts: It export files to other formats, including TopoJSON, which is required for Shape Map.
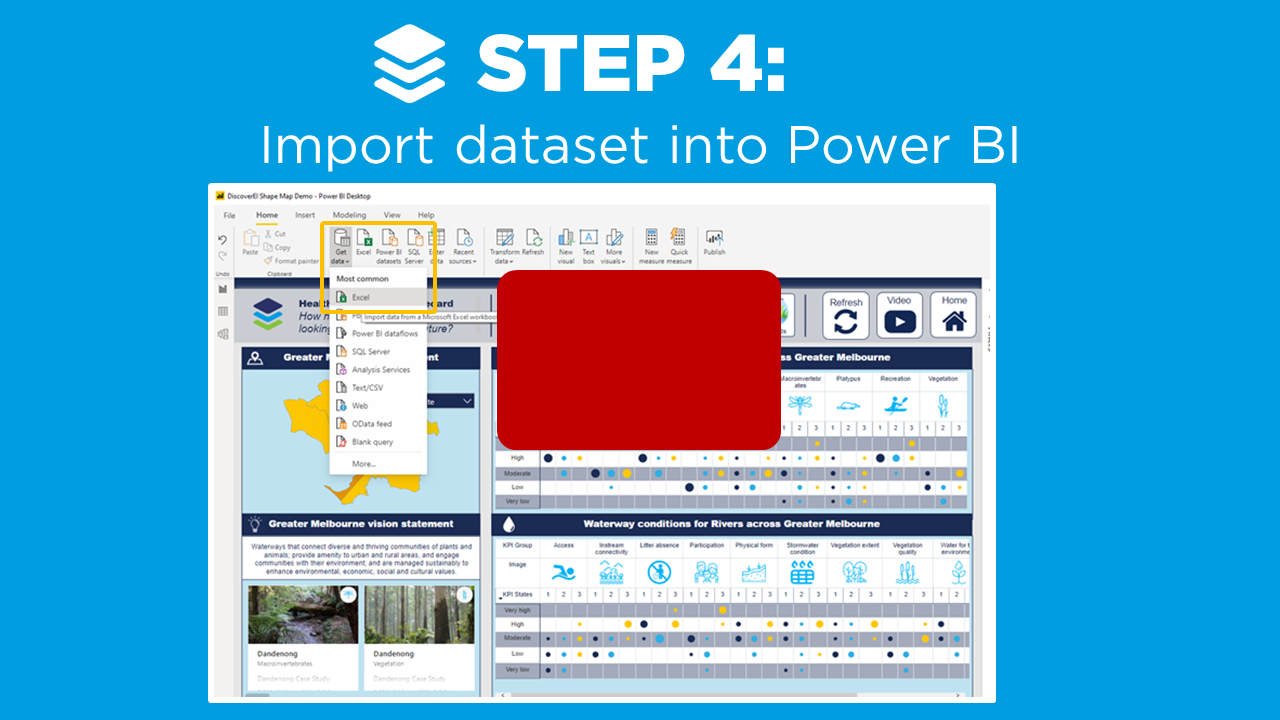
STEP 4: Import Dataset
▶️ Skip ahead in the video to Step 4 ▶️
We’re getting really close to creating our custom Shape Map, so please hang in there! But first we need to import our spatial attributes as a dataset into our Power BI model.
Create your dataset: You need to create the dataset of the attributes that are in your spatial file, and link this into your Power BI data model. This is often the region names or an index number. An easy way to generate this list is to convert your spatial file into a DBF format (by again using Map Shaper), and opening this up in Excel.
Import your dataset: Import the attribute list into your Power BI model as usual (i.e. Get Data).
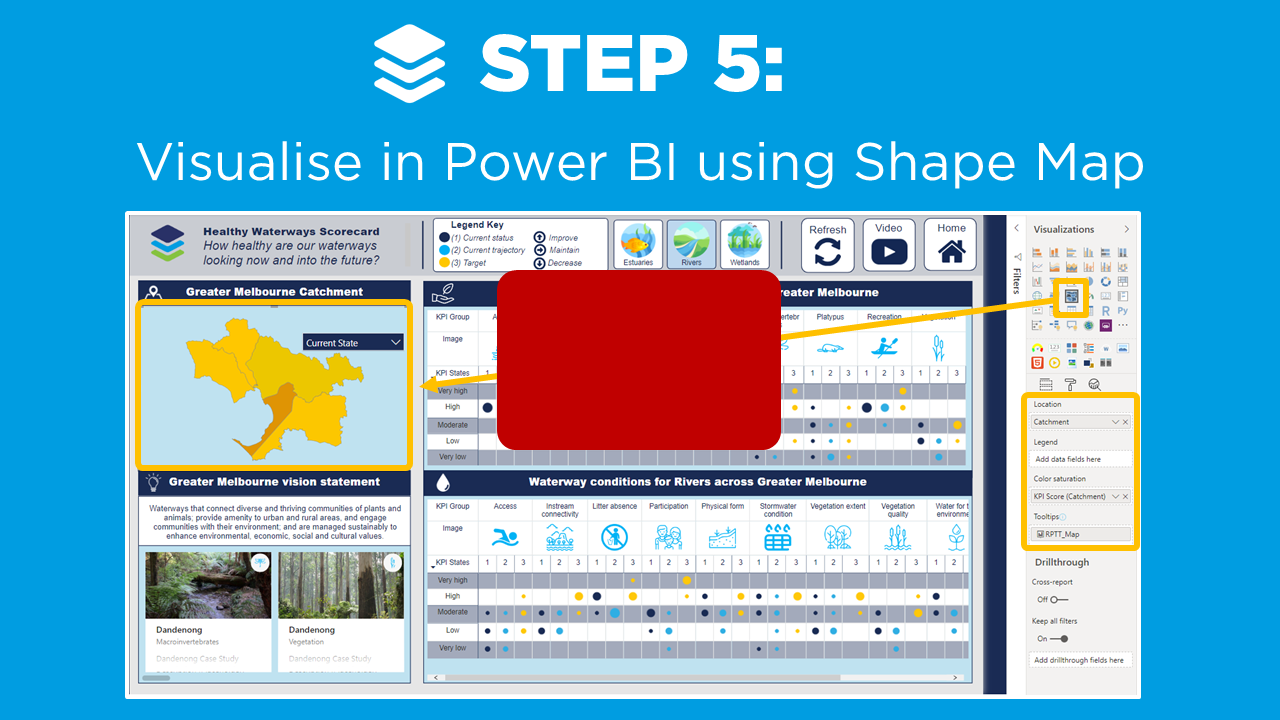
STEP 5: Shape Map
▶️ Skip ahead in the video to Step 5▶️
First, we need to activate the Shape Map visual in our Power BI report (as it’s currently in preview). Now we’re ready to create our customised Shape Map in Power BI.
One thing to be aware of is that the Shape Map visual doesn’t have an option to display a legend. One of our favourite ways of adding more context to the Shape Map is by using Report Page Tooltips. We’re big fans of Report Page Tooltips, because they allow you to display so much more than just the name and value. You can configure lots of different metrics together to help your users interpret your map. We have a blog post on How To Create Report Page Tooltips using our Shape Map as an example! Click on the button below to take a look!

Shape Map is a preview visual (at the time of this post), so we need to activate it:
Navigate to File and select Options and Settings. Choose Preview Features and tick Shape Map for on.
Then restart Power BI
Drag the Shape Map visual onto your Power BI canvas and add the dataset which contains your common linking fields into the ‘Location’ field well, and adjust the formatting options:
Under the Format options select Shape then Map, add Map and navigate to your JSON file and import it.
Add a measure or column into the Colour Saturation field to dynamically change the colour of your different regions.
In Summary…
By applying these 5 steps, we’ve created our own custom Shape Map in Power BI.
Head across to the Power BI Data Stories Gallery to play around with our Power BI report for yourself!!

How have you used the Shape Map or other Power BI mapping visuals to your advantage?
Please post in the comments below - we’d love to hear from you!
Power BI Training Courses
We’re really excited to announce the DiscoverEI teams virtual 2-day Power BI training courses, to fast-track your Power BI journey. Click on the links below to learn more, or get in touch today!


Do you want to learn how to design engaging and intuitive Power BI reports, which communicate your key insights at a glance and tell your data story?
Our two-day Power BI training course is designed specifically for Power BI Professionals and Data Analysts, and provides our best practice tips, tricks and hacks to help you transform your data! We provide this course online, in-person group sessions, or customised in-house training for your team. Places are limited (max 8 participants per class) so secure your spot today!